Hi Folks,
I believe you guys know that there are lot of enhancements and design changes in retail R3. Because of this reason, I got to take a break from sharing Retail knowledge as I don’t want my posts to go obsolete on R3
Now, I’m with you to help you ramp up with retail R3. In today’s post, we are going to understand how workers are connected to a Store and how a POS person can connect to POS system.
If you are new for Retail, I would suggest you to refer to my previous post on basic retail understanding.
http://daxing2012.wordpress.com/2014/04/07/306/
Linking workers to stores:
Initially, when I started working with AX2012 retail, I went crazy to configure an employee to be able to log in to POS system, because, I didn’t find any documents that explain me the things. So, keeping the Retail beginners in mind, I’m writing few initial posts on retail. So, experts, you should bear me initially. :D.
When we open retail POS, it asks for Operator ID and password; what should we submit there?
(In previous post, we understood how to identify, to which store my POS system connected to.)
Personal number of employee is going to be Operator number that we need to submit during the POS login.
Transfer data changes to the store database:
As we discussed in the previous post, to get the data transferred from AX database to store database, you would need to run some jobs.
To transfer the employee related data to the store database:
How to configure a new employee to be able to login to the POS:
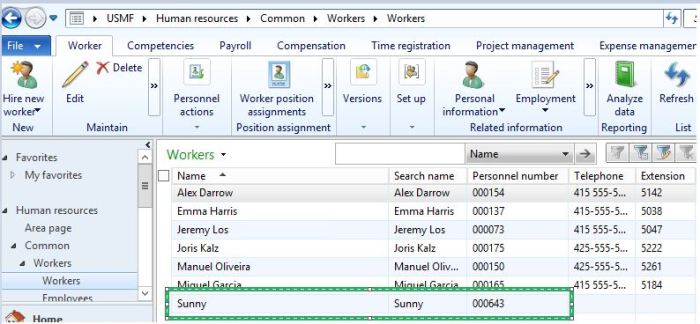
Scenario: Sunny is a new employee who has been hired to Seattle store and has to be given access to login to the POS.
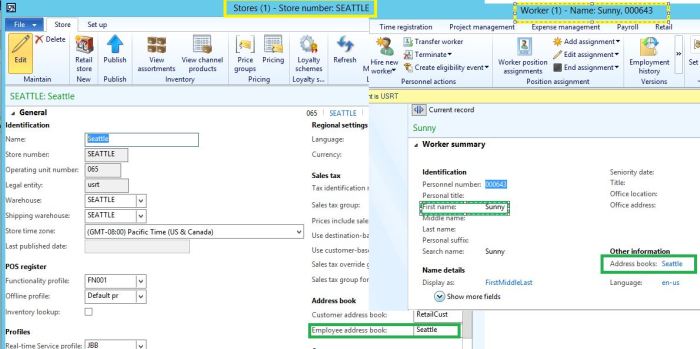
Employees should be in the address book of the stores to gain the access to the POS. Let’s see how to link an employee to the stores.
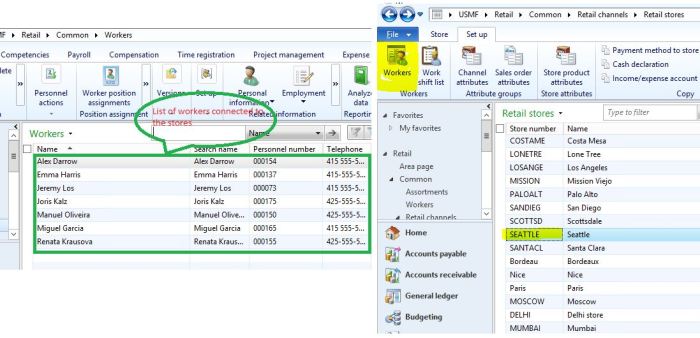
Go to Stores and select “Seattle” store to see the “Address book” of the stores. A new employee who is hired should be linked with the same address book as stores.

You can notice “Sunny” is now an employee connected to “Seattle” store.
Points to remember while you are linking an employee to a store:
Guys, with this information you will now be able to login to POS and start exploring the POS system. In my further posts, I will take you with the configurations part.
DAX to the MAX – Sunny

