PowerApps and Flow are great, and there are a lot of standard connectors that we can use within our PowerApps and Flows. But sometimes we may want to do something just a little different where there is no connector out of the box.
This is when we may want to create a custom connector within PowerApps.
The next question is how do we write the function for the custom connector, and the answer to that is we can do it through Azure using Function Apps. These allow us to register a function service within Azure and then code our function online without even having to open up Visual Studio.
In this walkthrough we will step through how you can do this, and also introduce the Azure Function Apps to those of us that have never used them before.
Topics Covered
Creating an Azure Function App
Creating a Function within our Function App
Creating a Swagger definition for the Azure Function
Creating a custom PowerApp Connector to the Azure Function
Creating a new Connection to our Function App Connector
Using Azure Function Connector in a PowerApp Flow
Running the Flow
Creating an Azure Function App
The first step in this process is to create a new Function App within Azure that we will use to house our custom function that we will eventually register and consume within PowerApps.
To do this, open up the Microsoft Azure portal and click on the + button to add a new resource. Then type in Function App into the search box to find the Function App resource type and select it.
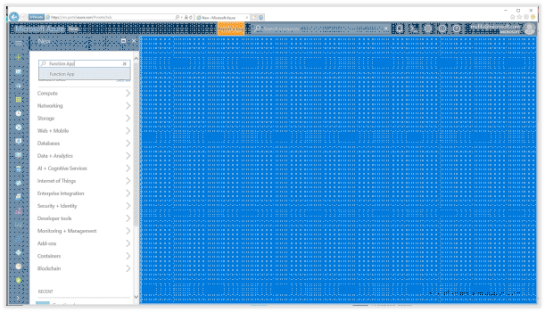
This will take you to the Function App creation form.
All we need to do here is click on the Create button.
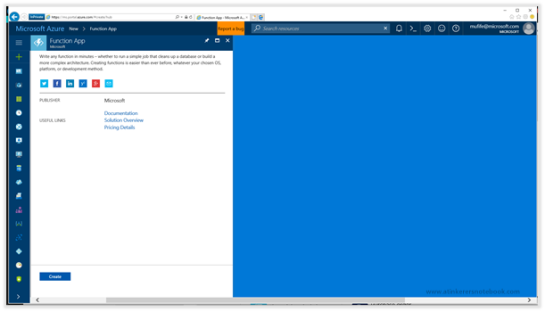
This will take us to the Function App Create dialog where we will want to set up a few defaults for our Function App.
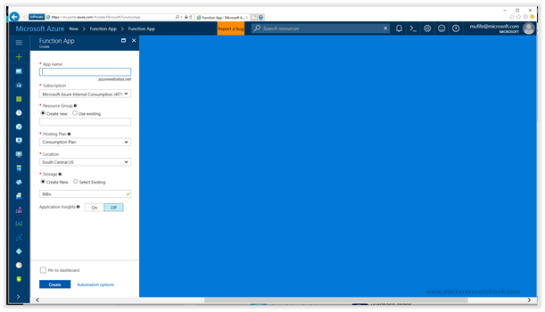
We will start off by giving our Function App and App name.
Here we set our App name to dicerollerapp.
Sometimes you may need to tinker with the App name a little to find a function name that is not already reserved within the azurewebsites.net domain, so if the name you choose is reserved, then just try different variations until you find one that works.

This will automatically default in values for the Resource Group and also the Storage account, and we will leave these as the default values.
To make the function easier to find, also check the Pin to dashboard option, and then click on the Create button to create our new Function App.

This will return us to our Azure dashboard and we will see that the Function app is being provisioned for us.
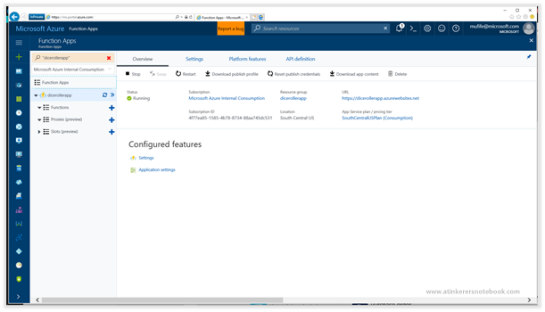
After the Function App is created, just click on the tile.
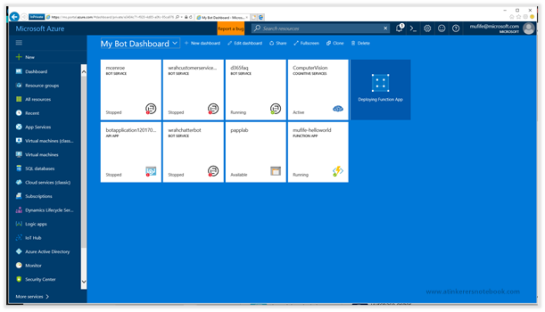
This will take us to the Function App
Overview form where we can start creating our functions.
Creating a Function within our Function App
Now that we have registered our Function App within Azure, we can start creating the function that we will want to perform within our PowerApp.
To do this, click on the Functions tab within the Function App explorer and then click on the + New function button.
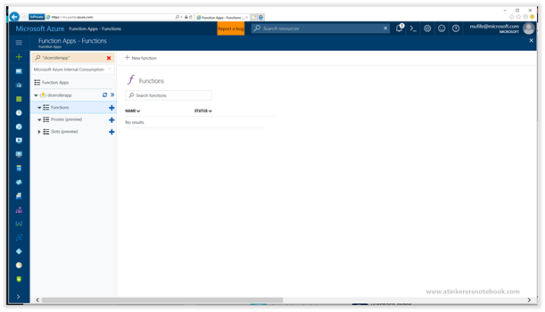
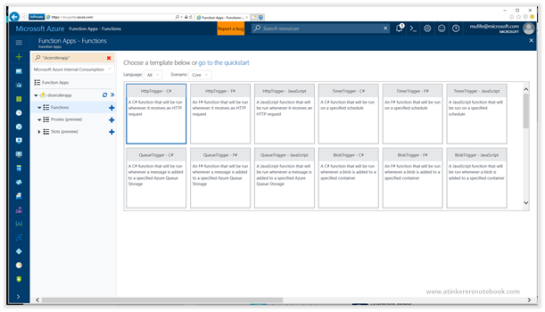
This will open up a list of templates that we can choose from for our Function App.
For this example we will select the HttpTrigger – C# template.
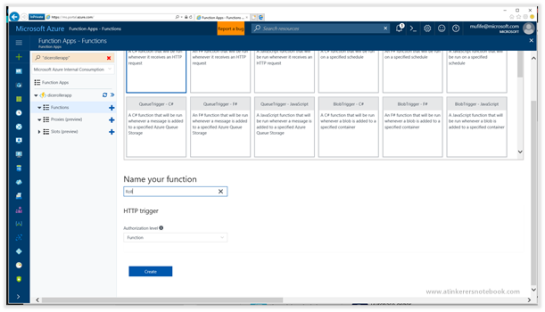
This will show us some default details that we will can update for our Function App.

If we want we can change the Name of the function to something a little less generic.
Here we changed the Name to Roll and then clicked on the Create button.
This will create a new C# function for us with a little bit of code to help us along the way.

Rather than use the default code we will replace it with the following function.
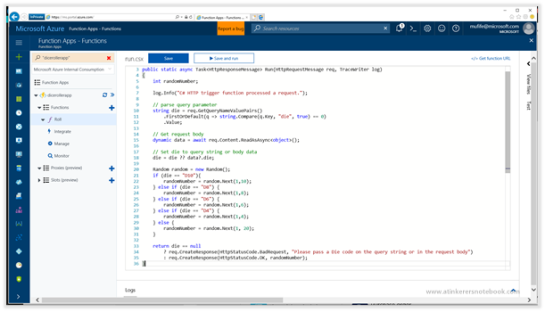
using System.Net;
public static async Task<HttpResponseMessage> Run(HttpRequestMessage req, TraceWriter log)
{
int randomNumber;
log.Info(“C# HTTP trigger function processed a request.”);
// parse query parameter
string die = req.GetQueryNameValuePairs()
.FirstOrDefault(q => string.Compare(q.Key, “die”, true) == 0)
.Value;
// Get request body
dynamic data = await req.Content.ReadAsAsync<object>();
// Set die to query string or body data
die = die ?? data?.die;
Random random = new Random();
if (die == “D10”){
randomNumber = random.Next(1,10);
} else if (die == “D8”) {
randomNumber = random.Next(1,8);
} else if (die == “D6”) {
randomNumber = random.Next(1,6);
} else if (die == “D4”) {
randomNumber = random.Next(1,4);
} else {
randomNumber = random.Next(1, 20);
}
return die == null
? req.CreateResponse(HttpStatusCode.BadRequest, “Please pass a Die code on the query string or in the request body”)
: req.CreateResponse(HttpStatusCode.OK, randomNumber);
}
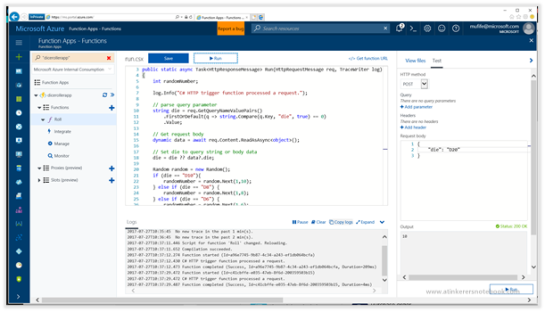
To test the function, all we need to do is click on the Run button, which will compile the code and then try to perform the function.
Initially the function will fail, because our code has a parameter of die that we need to pass through to it, and if you look on the right hand side, within the Request body the function is passing a parameter of name.

If we change the parameter name to die, give it a value of D20 and then run the function then we will see in the Output area we will get a random number between 1 and 20.
Creating a Swagger definition for the Azure Function
Now that we have created our function we will need to create a Swagger definition for our Function app.
This is the definition that PowerApps will use to know where the Function App is and also what all of the parameters and returned values are for the function.
To do this we will just create a new text file and paste in the following code into it.

{
“swagger”: “2.0”,
“info”: {
“version”: “1.0.0”,
“title”: “DiceRollerApp2“
},
“host”: “dicerollerapp.azurewebsites.net”,
“paths”: {
“/api/Roll“: {
“get”: {
“description”: “Calls my azure function over https”,
“operationId”: “RunThis”,
“parameters”: [
{
“name”: “code”,
“in”: “query”,
“description”: “code”,
“default”: “FIPSu1oqs1SJaurLPakKNGQaH9CHCEF7lvetzif7ZsriN1uJ8J88MA==“,
“type”: “string”
},
{
“name”: “die”,
“in”: “query”,
“required”: true,
“default”: “D20”,
“type”: “string”
}
],
“responses”: {
“200”: {
“description”: “Successful response”,
“schema”: {
“title”: “The response of the api.”,
“type”: “string”
}
}
}
}
}
}
}
There are a couple of changes that we need to make to this file though to make sure that it is pointing to our new Function App.
The first one is to update the title of the definition to match our function.
For this example we set the title to DiceRollerApp.
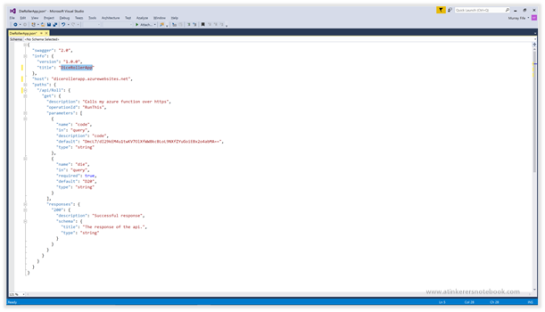
Then we will want to change the host URL to point to our Function App. This is the name that we initially gave out Function App when we created it.

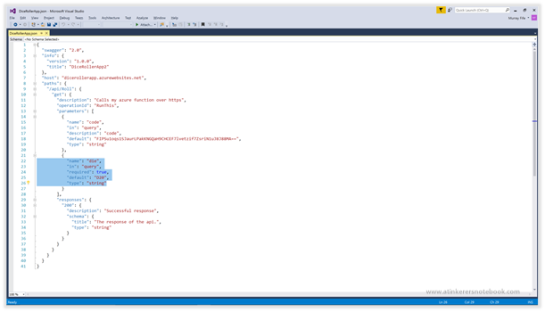
Because we changed the name of the function within the Function App we will also want to update the path URL to reference the name of the function that we used.
For this example the path is /api/Roll.

Also because we changed the name of the parameter that we are passing to the function from name to die then we will also want to update the parameter definition to match that parameter.
There is one last change that we need to make to the Swagger definition, and that is to give it a Host key code that it will use to authenticate against the Function App.
To find this, return back to the Function App and click on the Settings tab in the header.
At the bottom of the form you will see that there are dome Host Keys.
Click on the Click to show link for the default host key.

This will show us the Host key code and we will want to copy the key.
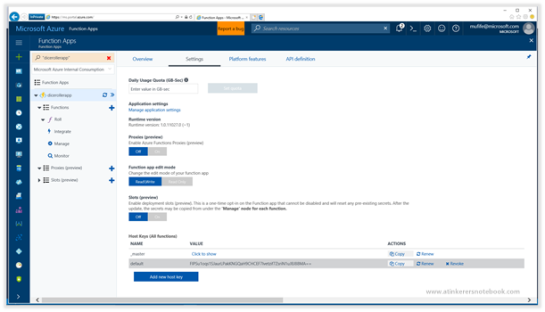
Now return back to the Swagger definition and paste the Host key code into the default value for the code parameter.
After we have done that we can save the file.

Creating a custom PowerApp Connector to the Azure Function
Now that we have created our Swagger definition, we will want to create a new custom connector within PowerApps that calls the Azure Function.
To do this, open up PowerApps and then click on the Connections menu item.

This will open up the Connections form and we will want to click on the Manage custom connections button in the header.

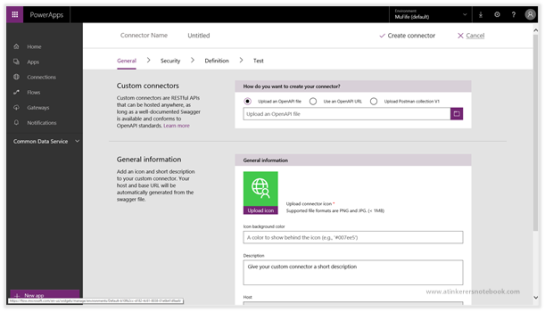
When the Custom connections page is displayed, click on the Create custom connector link.

This will open up a definition form for our new Custom connector.
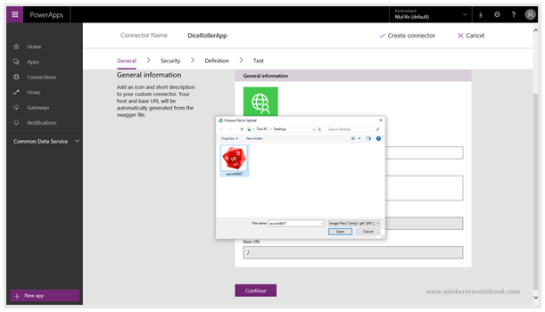
Now click on the folder icon for the Custom connectors and find the Swagger file that we just created and click on the Open button.
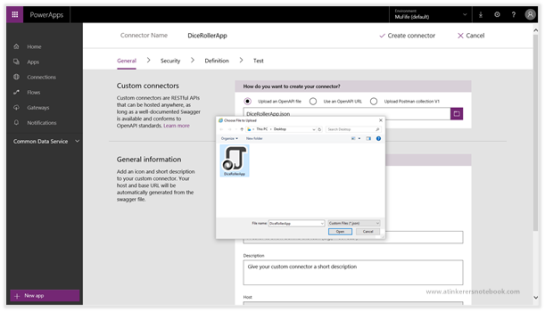
This will load in the default configuration for the Function App and also set all of the parameters for the connector.
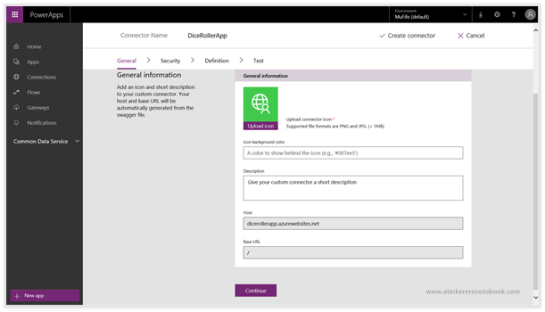
We can add a custom icon for the connector if we like just by clicking on the Upload icon button and then selecting a picture.
For this icon we have a white background, so we will want to make the Icon background color match this and set it to the hex color for white which is #ffffff.
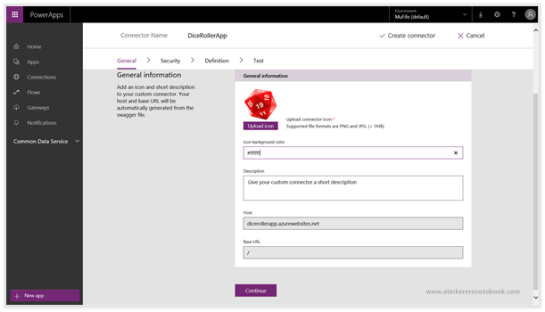
Finally we will give out connector a Description and then click on the Continue button.

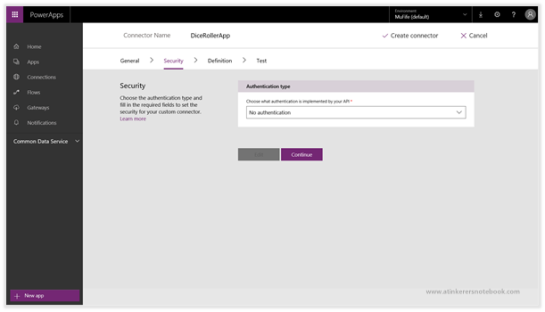
This will take us to the Security tab and all we need to do here is click on the Continue button.
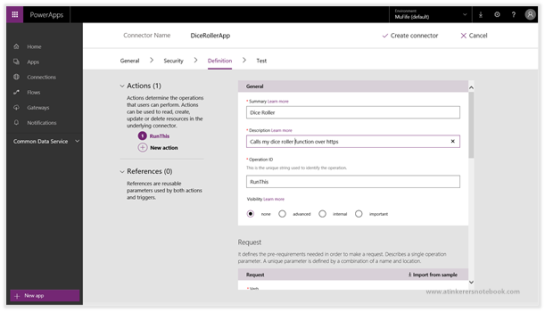
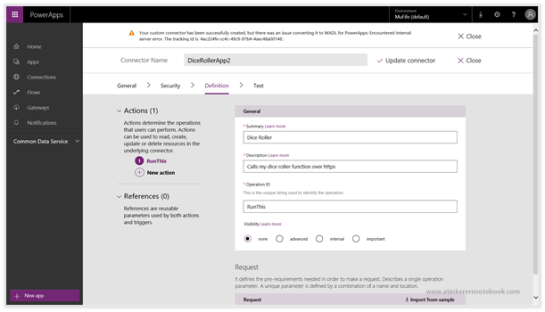
Now we will be taken to the Definition tab where we can add a little more detail to our connector.

Start off by adding a Summary for the connection.
Here we wet the Summary to Dice Roller.

And we also changed the Description to explain a little about what the connector does.
After we have done that we will want to click on the Create connector button in the header to create the connector with all of the definitions that we supplied.
After a few seconds we will get a notice that the connector was created and we can then click on the Test link to start testing the connector out.
Creating a new Connection to our Function App Connector
Now that we have created our Connector we will want to create a connection to it within PowerApps so that we can use it.
To do this, click on the + New connection button on the Test page.

This will open up a dialog box asking us if we really want to create a connection and we will want to click on the Create button.
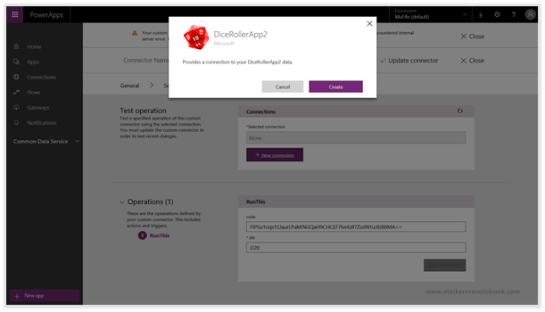
This will create a new Connection for us within PowerApps.

Using Azure Function Connector in a PowerApp Flow
Once we have a Connection within PowerApps to our Function App, we can start using it within our Flows.
To do this, click on the Flows link within the menu bar on the left and then click on the Create from blank link in the header.

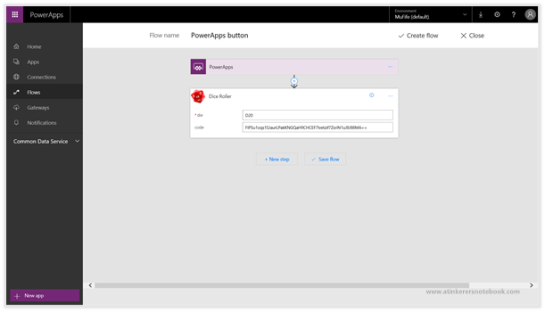
This will create a new PowerApp button for us to start building our Flow around.
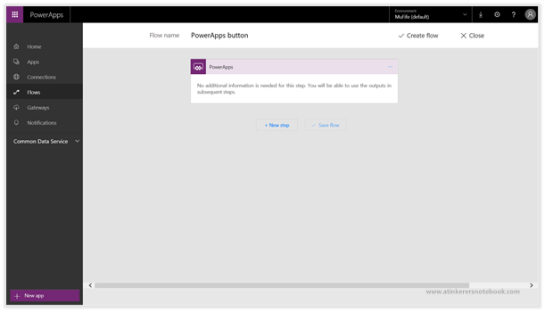
Start off by clicking on the New
Step button and then click on the Add an action button.

When the Choose an action form is displayed, we can now search for the new connector that we created and select the Action that we want to link to the flow.
In this case I was able to find the DiceRollerApp and select the Dice Roller action.
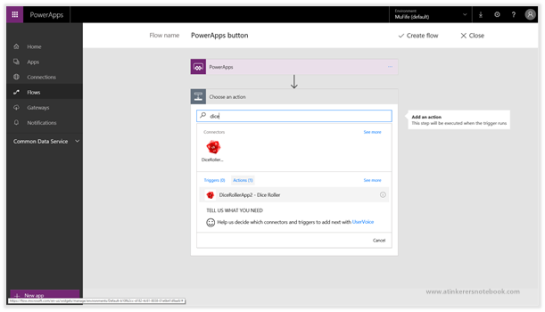
And now we have a new action in the Flow that will allow us to call the Azure Function App.
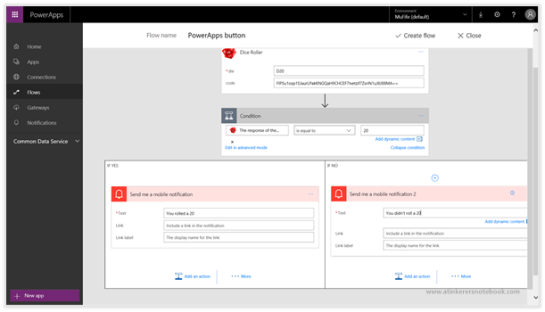
If we want to act on the results of the function we can add in a condition and then when we select any value field, the returned value shows up from our Function App.

Now we can flesh out our Flow a little bit so that it has a couple of notifications based on the result that is returned from the Function App.
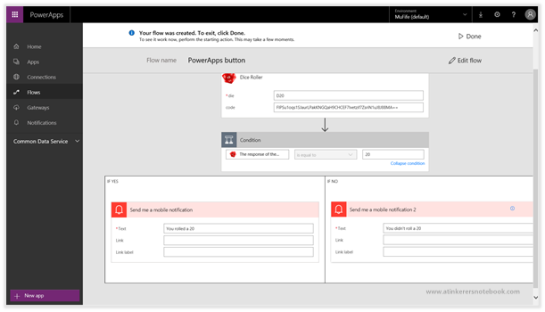
When we are done we can click on the Create flow button to create the flow.
After the flow has been created, all we need to do is click on the Done button.
Running the Flow
Congratulations. We now have a Flow that uses our Custom Connector, which in turn calls the Function App that we created in Azure. Let’s see it in action.
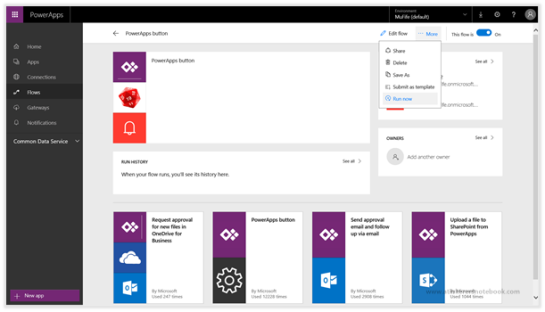
To see the flow running and calling the Function App, just click on the Pencil icon to the right of the flow.

This will open up the Flow and show us the steps and also that it is using our new Connector that we created.

To test out the Flow, just click on the More button and then click on the Run now link.
This will open up a dialog box asking us if we really want to run the Flow.
All we want to do here is click on the Run flow button.

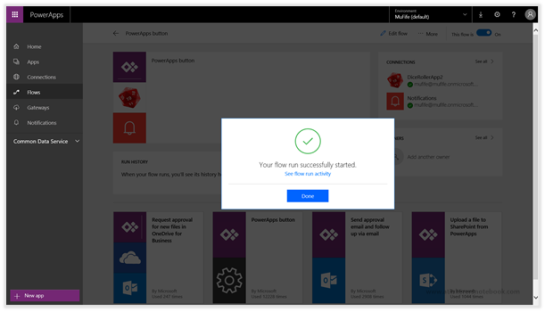
This will then tell us that the flow ran successfully.
To see the flow execution, just click on the See flow run activity link in the dialog box.
This will open up the Activity list and we will see that the Flow ran successfully.
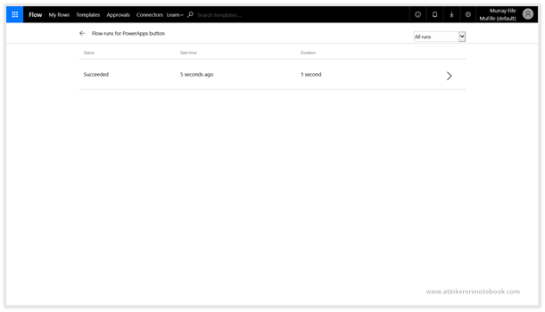
If we drill into the Flow we will be able to see that the Dice Roller ran, and also that the second notification was triggered.

If we expand out the Dice Roller step then we will also see that we rolled a 10.
Better luck next time I guess.

Review
Now we have a way that we can create our own custom functions and then add them into PowerApps as a custom Connector.
By using the Azure Function Apps we can create pretty much any type of function that we can think of.
For example, we can use this same scenario to create
Text manipulation or search functions,
Random data generators
Calls to other services that are not yet available within PowerApps
How cool is that?
