In this example, the customer page in EP displays detailed information about a customer. The User Control displayed in a User Control web part is used to display the data on the page and the AxForm is the main component of the User Control used. 
A common customization is adding/changing the fields that are displayed in an entity overview page.
This walkthrough demonstrates how to add a field to the first group that appears on the View customer entity overview page. The below figure illustrates the tasks be performed:
This walkthrough demonstrates how to add a field to the first group that appears on the View customer entity overview page. The below figure illustrates the tasks be performed:

Prerequisites:
Basic prerequisites to be checked and available before proceeding for the walkthrough are:
1. Microsoft Dynamics AX
2. Enterprise portal
3. Visual Studio 2010
4. Visual Studio Tools installed (Ax Installation)
5. EP Administrator rights
Before you can modify the fields displayed on the View customer page, you must determine which User Control is being used for that page.
To determine the User Control to modify:
1. Using a web browser, open Enterprise Portal. << http://<servername>/sites/DynamicsAx/ >>
2. Click Sales on the top link bar, this displays the All Customers list page. Select one of the customers in the list, and then click View. The View customer page with customer information is displayed.
3. In the ribbon, display the Page tab.
Click the Edit Page command.

Click the Edit Page command.

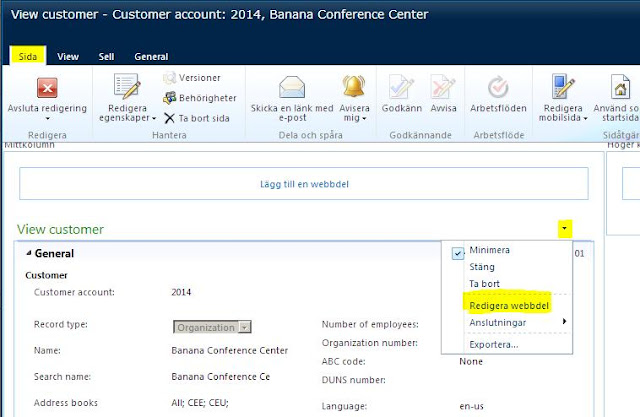
4. Locate the View customer web part in the middle column. In the drop-down menu for this web part, click Edit Web Part. The drop-down menu is the small arrow found on the upper-right corner of the web part.

5. In the list of properties for the web part, locate the Managed content item property. It is set to CustomerOverview, which is the User Control that is being displayed in the web part. This is the User Control that will be modified.


6. Click Cancel to close the list of web part properties.
7. Click Stop Editing to return to the View customer page. Close the page.
Visual Studio is used to modify User Controls for Enterprise Portal.
To create the EP Web Application project:
1. Start Visual Studio. To make sure you start Visual Studio with administrative privileges, right-click the shortcut for Visual Studio and then click Run as administrator.
2. In the File menu, click New, and then click Project.
3. In the New Project window, select .NET Framework 3.5 as the framework version to use.
Important: For this release of Microsoft Dynamics AX, the EP Web Application project must target the .NET Framework 3.5 to work correctly.

Important: For this release of Microsoft Dynamics AX, the EP Web Application project must target the .NET Framework 3.5 to work correctly.

4. In the Installed Templates list, select Microsoft Dynamics AX. If you do not see this project template, make sure that you have Visual Studio Tools for Microsoft Dynamics AX installed.
5. Choose the EP Web Application template.
6. Specify a name for the project, and the location of the folder where you want to store the files for the project.
7. Click OK to create the project.
#3:Adding the User Control to the EP Web Application Project
You must add the User Control to the EP Web Application project so that you can modify the User Control’s properties.
You must add the User Control to the EP Web Application project so that you can modify the User Control’s properties.
To add the User Control to the EP Web Application project
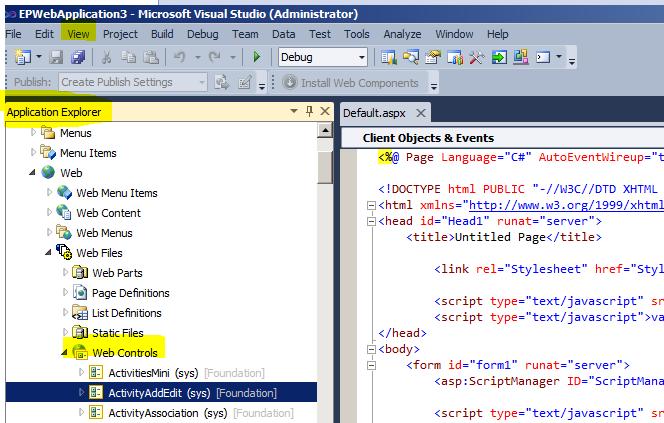
1. In the View menu in Visual Studio, click Application Explorer.
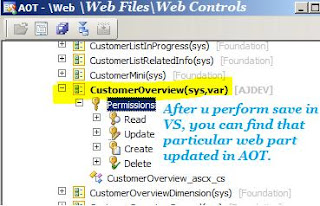
2. In the Application Explorer, expand the Web > Web Files > Web Controls node.
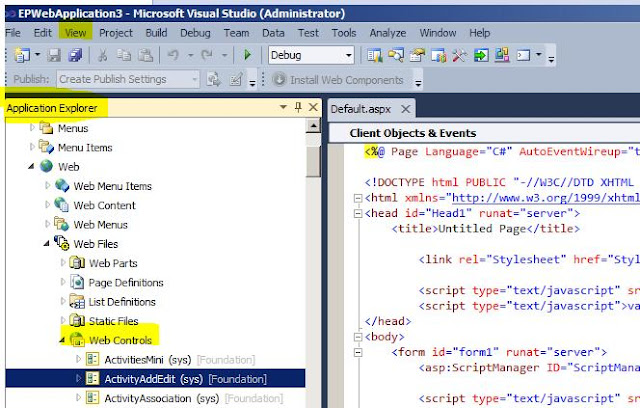
3. In the Web Controls list, locate the CustomerOverview control.
4. Right-click the CustomerOverview control, and then click Add to project. The control and several related controls are added to the project.
5. Close the Application Explorer.
To modify the User Control
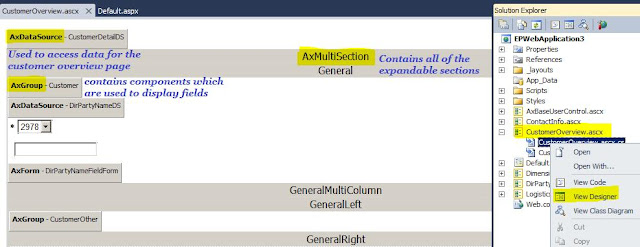
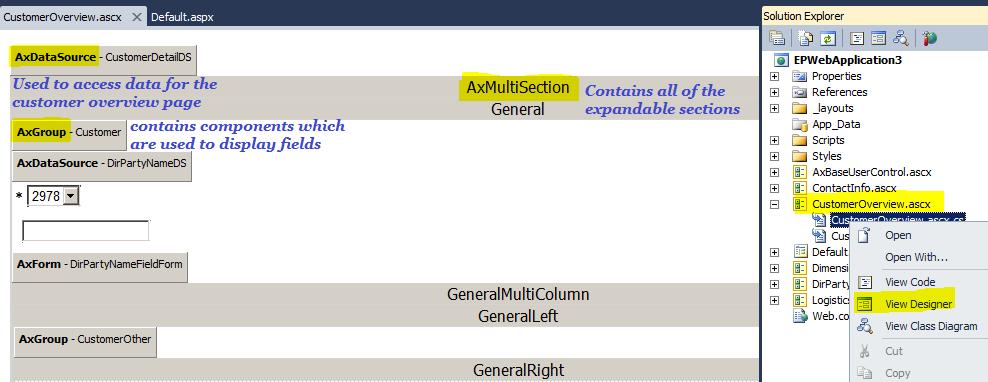
1. Locate the CustomerOverview.ascx component in Solution Explorer.
2. Right-click the CustomerOverview component in Solution Explorer, and then click View Designer.
3. After a few moments, you will see several components in the control layout. The AxDataSource component is used to access data for the customer overview page.
The AxMultiSection component contains all of the expandable sections that you see in the View customer page.
The sections contain AxGroup components, which are used to display fields.
The AxMultiSection component contains all of the expandable sections that you see in the View customer page.
The sections contain AxGroup components, which are used to display fields.
4. Click the Customer AxGroup component directly in the layout to select it. This component contains the fields that are displayed at the top of the General section of the View customer page.
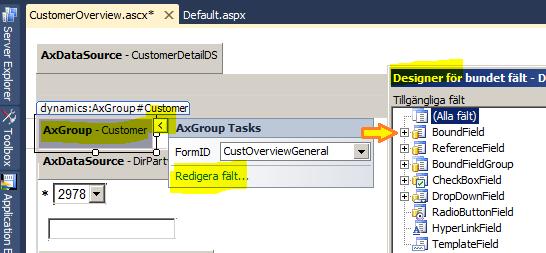
5. To modify the fields that are displayed in the group, use one of the following methods:
a. Display the context menu at the upper-right corner of the AxGroup control in the layout. Click Edit Fields to display the Bound Field Designer.
-or-
b. Locate the Fields property in the Properties list. Click the ellipsis button to display the Bound Field Designer.
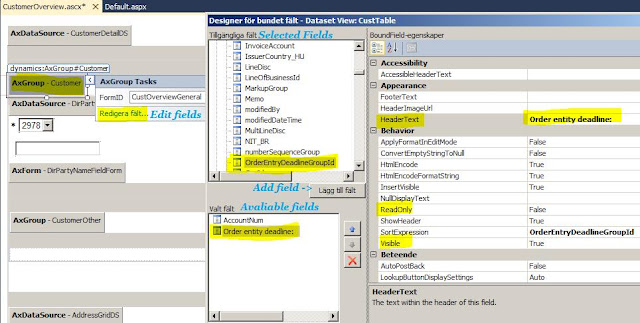
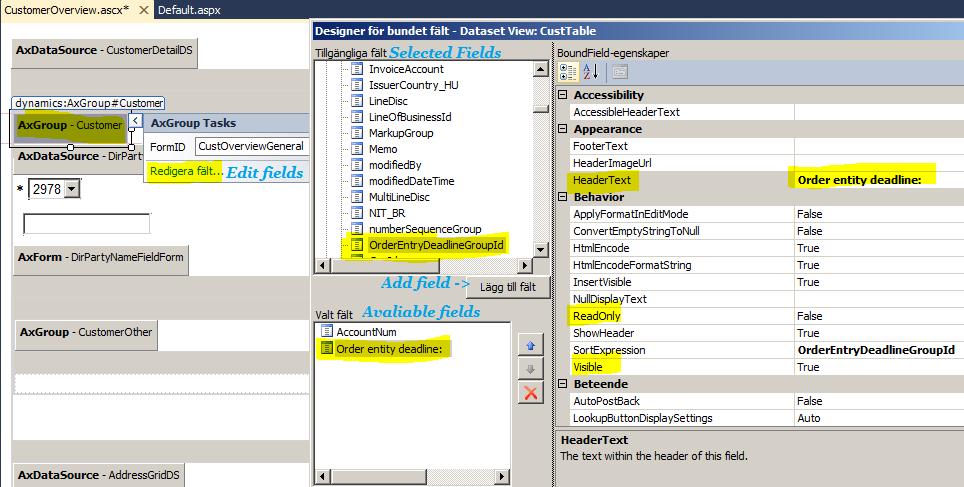
6. The Selected Field list contains the fields that appear in the group. Only the AccountNum field is included. In the Available Fields list, select the OrderEntryDeadlineGroupId field. Click Add Field to add this field to the list of fields that will be displayed in the group.
7. Make sure that the OrderEntryDeadlineGroupId field is selected in the Selected Field list.
8. In the BoundField Properties list, locate the HeaderText property. Set the value of this property to Order entry deadline:.
9. Click OK to save the changes to the list of fields for the AxGroup.
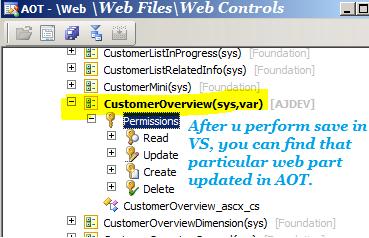
10. In the File menu, click Save CustomerOverview.ascx to save the changes you made to the User Control. The changes are exported automatically to the AOT. The updated User Control is also deployed to the Enterprise Portal server.
#5: Viewing the Customization in Enterprise Portal
After the field has been added to the User Control, you can view it in Enterprise Portal.
After the field has been added to the User Control, you can view it in Enterprise Portal.
To view the customization in Enterprise Portal
1. Using a web browser, open Enterprise Portal.
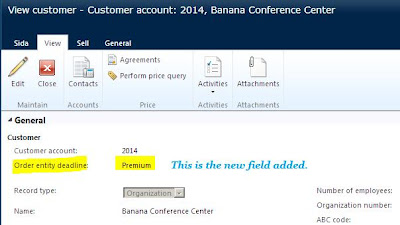
2. Click Sales on the top link bar. Display the All Customers list page. Select one of the customers in the list, and then click View. The View customer page with the customer information is displayed. You will see the customer details, including the Order entry deadline field that you added.

Information collected from: http://msdn.microsoft.com/EN-US/library/cc556964.aspx
转载请注明:ww12345678 的部落格 | AX Helper » Walkthrough: Adding a Field to a User Control [AX 2012]