After configuring your server with for Power view, its a time to create sample Power view report and link it to Dynamics AX. This post includes following steps:


- Creating power view data source (if not already created)
- Create power view report
- How you can share the created report b/w Systems
For the demo purpose I am going to create power view report for Purchase cube. You have to go to Your EP home page and select Site actions > View All site contents

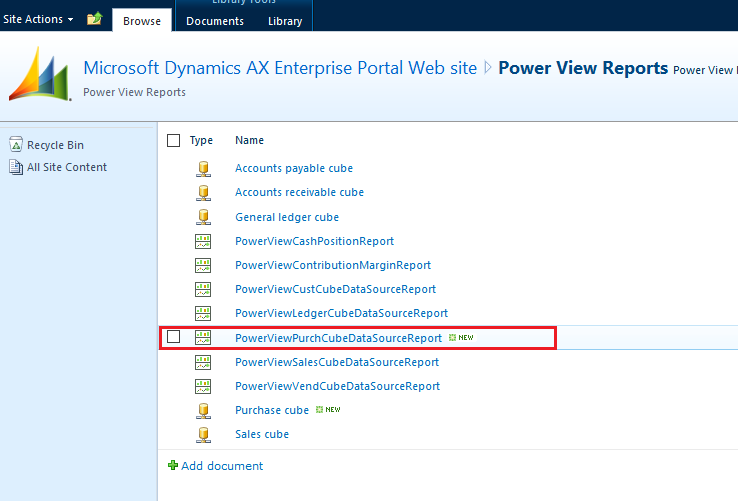
Now select "Power view reports" link, it will open power view report root library where you can see all your power view reports along with their data sources.

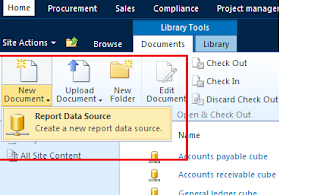
In my scenario, purchase cube data source is not available in the library so I have to create power view data source first. To do this select "Document" from action page and select "new document"> Report data source

It will open report data source form, Set Name = "Purchase cube" and rest of the fields as defined in below image and Press OK button.

Set connection string as:
Provider=MSOLAP.4;Integrated Security=SSPI;Persist Security Info=True;Data Source=;Initial Catalog=Dynamics AX initial;Locale identifier=1033;Cube=Purchase cube
Remember Cube=your AX cube name
Your power view library looks like this:

Now you can use this data source to create new power view report. To do this Select newly created data source (which is Purchase cube in our case), it will open power view report designer window along with Cubes measures and Dimensions. Perform your desired operation like Bar chart/pie chart etc (I left it blank) and Press "Save" icon from top right, it will open Save as window like this:

Set proper name of the report and click Save button, now you can see your new report in power view library.
Next you have to link this report with existing EP Power view page named "PowerViewDataSourceGeneratorPV". To access this page, go to Site action>All site content> Enterprise portal
Next you have to link this report with existing EP Power view page named "PowerViewDataSourceGeneratorPV". To access this page, go to Site action>All site content> Enterprise portal

Navigate to to PowerViewDataSourceGeneratorPV and select it

You can see following page

Select Sit action > Edit page

Now add new web part

Now select "SQL server power pivot from Dynamics AX

It will add new web part, now Edit this web part:

Now select the object mentioned in following image in sequential manner

Now you are done with linking power view report to EP. Next step is to publish these changes. To do this Go to Dynamics AX AOTWebWeb Menu ItemsURLsPowerViewDataSourceGenerator and right click and select "Import page" option.

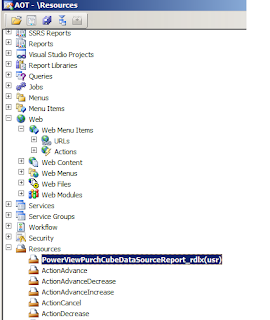
After importing page, the AOTWebWeb FilesPage DefinitionsPowerViewDataSourceGeneratorPV will also be updated and have reference of your new power view report. Also new Resource is been added as well.

That's it. you are done with your changes. now if you want to move the newly created report to other Server like Live server you just need to take XPO of AOTWebWeb FilesPage DefinitionsPowerViewDataSourceGeneratorPV and ResourcesPowerViewPurchCubeDataSourceReport_rdlx and import it on your destination server, then just Right click on AOTWebWeb FilesPage DefinitionsPowerViewDataSourceGeneratorPV and select "Deploy Element", it will deploy your report on your destination server Power view library.
Happy Daxing !!!