In this post, we’ll learn how to create a custom workflow.
Requirement:
Let’s say we have students in the system. Some of the students are blocked due to overdue semester fees. System should be able to allow user to submit such students to a workflow process for approval to a super user e.g. Principal. Once the Principal approves such students only then students should be allowed to take more courses in the next semester.
Development:
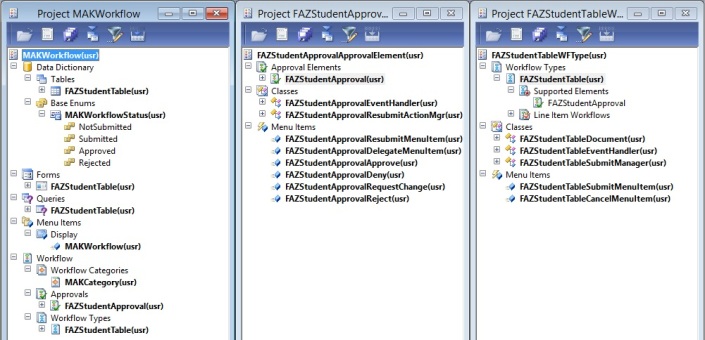
1. Create a Workflow state Enum to have the following elements:
- NotSubmitted
- Submitted
- Approved
- Rejected
2. Add field of type Workflow state enum to the custom table FAZStudentTable.
3. Override canSubmitToWorkflow() method of the custom table to define Workflow submission criteria.
public boolean canSubmitToWorkflow(str _workflowType = '')
{
    boolean ret = false;

    if (this.Blocked == NoYes::Yes)
        ret = true;

    return ret;
}
4. Create a Query for the custom table.
5. Create a Workflow Category.
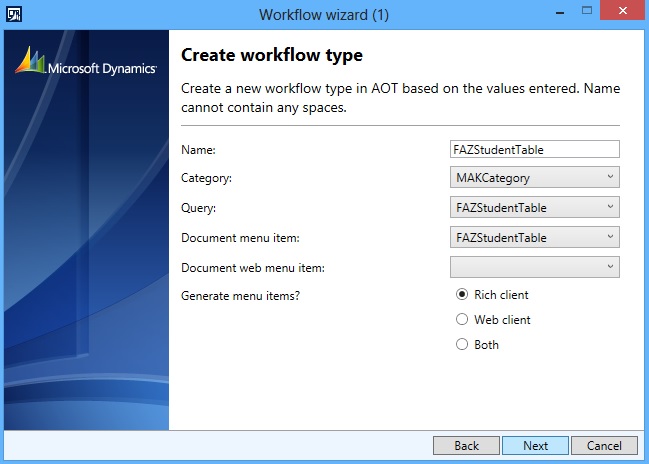
6. Create a Workflow Type using wizard.
where,
- Category – Name of the Workflow category just created.
- Query – Name of the query just created.
- Document menu item – Name of display menu item for the form to enable Workflow on.
The following artifacts will be created:
- Workflow Type
- Classes
- Document class which extends WorkflowDocument.
- EventHandler class which gives implementation to handle different workflow events.
- SubmitManager class.
- Action menu items:
- SubmitMenuItem pointing to SubmitManager class.
- CancelMenuItem pointing to WorkflowCancelManager class.
7. Enable Workflow on the custom form FAZStudentTable by setting Design node properties as follows:
- WorkflowEnabled – Yes.
- WorkflowDatasource – Name of the form datasource.
- WorkflowType – Name of the custom Workflow Type just created.
8. Give submit logic in SubmitManager class.
public static void main(Args _args)
{
    FAZStudentTableSubmitManager    submitManager;

    submitManager = new FAZStudentTableSubmitManager();
    submitManager.submit(_args);
}
public void submit(Args _args)
{
    FAZStudentTable         studentTable;
    WorkflowComment         note = "";
    WorkflowSubmitDialog    workflowSubmitDialog;

    //Opens the submit to workflow dialog.
    workflowSubmitDialog = WorkflowSubmitDialog::construct(
        _args.caller().getActiveWorkflowConfiguration());
    workflowSubmitDialog.run();

    if (workflowSubmitDialog.parmIsClosedOK())
    {
        studentTable = _args.record();
        // Get comments from the submit to workflow dialog.
        note = workflowSubmitDialog.parmWorkflowComment();

        try
        {
            ttsbegin;
            studentTable.WorkflowStatus = MAKWorkflowStatus::Submitted;
            ttscommit;

            // Send an Infolog message.
            info("Submitted to workflow.");
        }
        catch (Exception::Error)
        {
            error("Error on workflow activation.");
        }
    }

    _args.caller().updateWorkFlowControls();
}
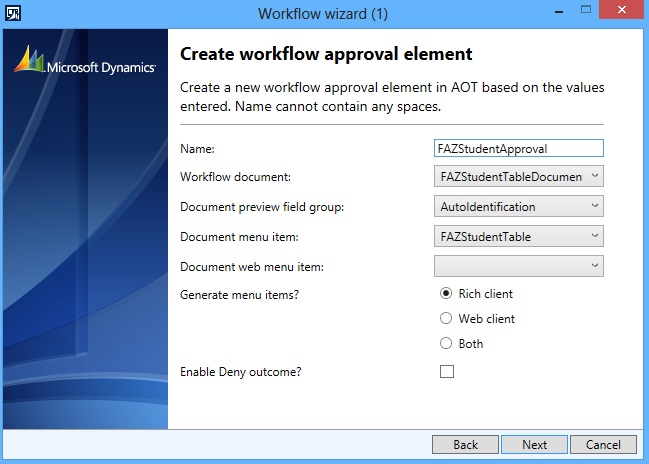
9. Create a Workflow Approval using the wizard.
10. Drag the newly created Approval to the Supported elements node of the custom Workflow Type.
11. Design the Workflow.
- Create display menu item pointing to WorkflowTableListPage form.
- On Properties sheet of the display menu item
- Set EnumTypeParameter to ModuleAxapta.
- Set EnumParameter to Basic.
- Drag this menu item to the Setup subMenu of area page of the desired AX module.
- On Properties sheet of the menu item
- Set IsDisplayedInContentArea to Yes.
- Navigate to the menu item to open WorkflowTableListPage to design the workflow.
- Create a new workflow instance of the Workflow Type you created.
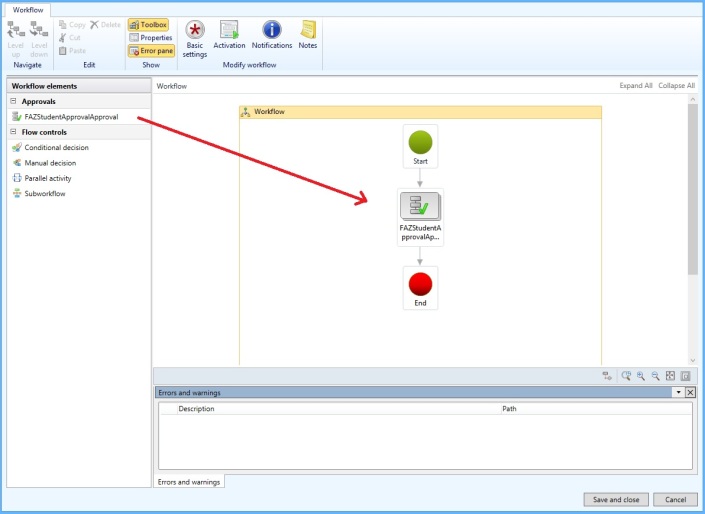
- Define the states from Start to End of the workflow.
- Drag approval element from Toolbox on the left to the Designer pane on the right.
- Connect the bottom of Start state with top of the Approval element.
- Connect the bottom of Approval element to the top of End state.
- Resolve any errors and warnings by setting workflow and approval element properties.
- Activate it.
12. Test the workflow.
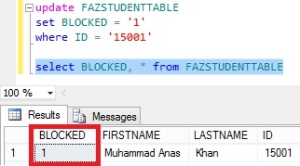
- Update records in the FAZStudentTable to meet the submission criteria of the workflow e.g. block one of the records in DB
- Navigate to the form FAZStudentTable enabled for the custom workflow.
- You can see in the picture below, selecting the particular record, the system allows user to submit student to the custom workflow created :)
For your reference, see below the artifacts created in this development process:
