
Hi There!
I hope everyone is having a great week so far. Summer is almost over here in the US, and I feel like I haven't taken much advantage of it this year. The good thing, however, is that I have been able to really focus on service development lately, and a ton of other cool AX stuff.
On this post I would like to share with you how to Create, Deploy, Troubleshoot and consume an external service in AX 2012 R2. As we all know, this has changed dramatically from AX 2009 services. It used to be very easy to consume services in AX 2009 (you can see an example in my post Consume a Currency Exchange Rates Web Service from AX 2009 - WFC ).
In AX 2012 R2, however, this has become somewhat more involved. They are not necessarily harder to create and consume, but they require a few more steps to be setup. Now, the great advantage is that you can resolve the business logic either in the client itself (C# project) or in AX 2012 R2 (Server deployment). This comes handy for business that don't necessarily want to have an AX developer in house and/or large scale integration projects, among other reasons.
Let's get to it!
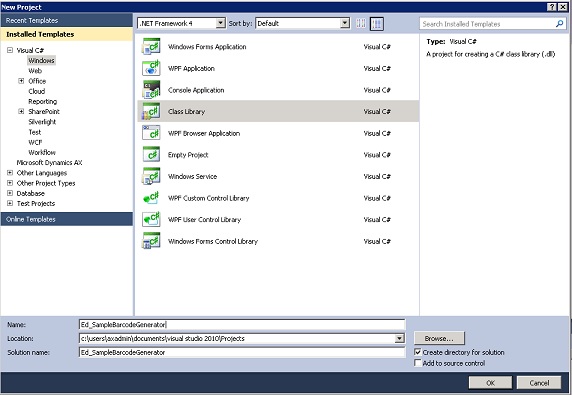
Open visual studio and create a new Class Library Project. Give it a name and click OK.
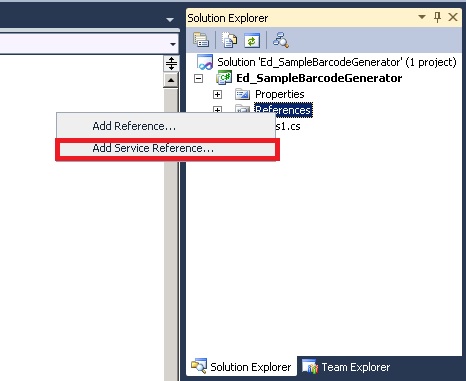
Right click the Project Name references folder and click the Add Service Reference button.
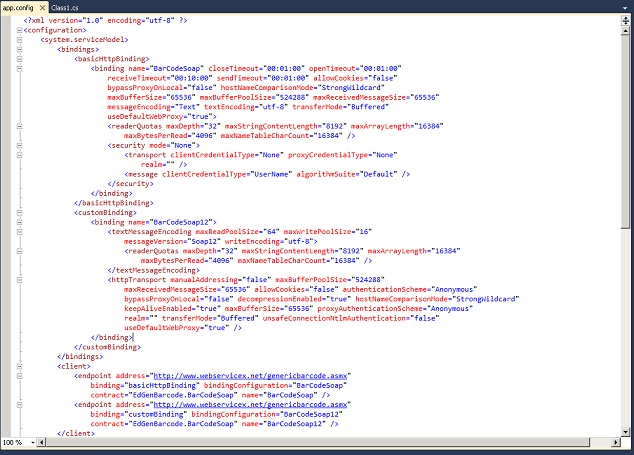
Paste the http://www.webservicex.net/genericbarcode.asmx?WSDL URL into the Address bar. This is a Barcode Generator service. Give it a name and click OK.

This will create a new Service Reference and a new AppConfig file where both the basic and custom bindings are automatically generated for you.
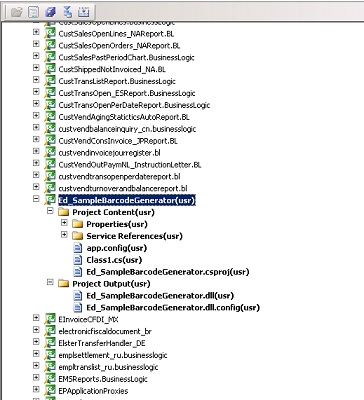
Right click the Project Name and choose Add "Service Name" to AOT. This will add the Csharp Project to the AOT under Visual Studio Projects/Csharp Projects.
Once the project has been added to the AOT, you can choose the following properties and deploy the service.
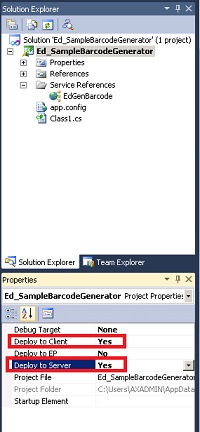
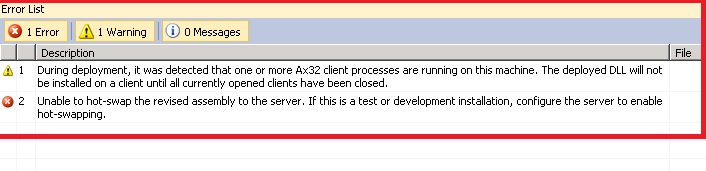
NOTE: If you choose to deploy to the server, you will need to enable Hot Swapping Assemblies on the server configuration file. See the following for more info (http://msdn.microsoft.com/en-us/library/gg889279.aspx). If you choose to do this, you will have to restart the AOS.

After it is deployed, you would add a code similar to the one below.
static void TestBarcodeGenService(Args _args)
{
Ed_SampleBarcodeGenerator.EdGenBarcode.BarCodeSoapClient service;
Ed_SampleBarcodeGenerator.EdGenBarcode.BarCodeData barCodeData;
System.Exception ex;
System.Type type;
;
try
{
service = new Ed_SampleBarcodeGenerator.EdGenBarcode.BarCodeSoapClient();
service.GenerateBarCode(barCodeData, "0000992882");
}
catch(Exception::CLRError)
{
ex = CLRInterop::getLastException();
info(CLRInterop::getAnyTypeForObject(ex.ToString()));
}
}
Well ... that's all for now folks. Stay tuned, there is going to be a huge load of useful information in the next few weeks.
